Tuesday, December 29, 2009

Christmas Candy

Better late than never, but here are the recipes from our Christmas candy this year. I just love homemade candy. My mom is much better. She makes all kinds of chocolates- homemade peanut butter, caramel, or truffle fillings hand-dipped in yummy milk and dark chocolate. Not to mention all the peanut and almond clusters!
I made my two favorites for our close friends- toffee and caramels. The toffee is a BHG recipe that I love because it's easy and never fails. I leave out the nuts, but it is wonderful with the almonds on top!
Next up is my absolute FAVORITE caramel recipe. I know this is so old school, but who out there likes See's Candy? My parents are old school, so I blame them. Actually, it dates back to my grandma, who was a huge See's fan. Anyway, they have the best caramels- soft, light, buttery and sweet. This Martha Stewart recipe is the closest I've had to See's. Yes, it does take a lot of corn syrup. And yes, it does take an hour of standing at the stove stirring. And yes, it does make 150 pieces that take 2 hours to cut and individually wrap. But it's SO worth it!
Golden Caramels

Ingredients

Makes about 150.

  • 4 cups heavy cream
  • 1 cup sweetened condensed milk (note: that is one CUP, NOT can)
  • 4 cups light corn syrup
  • 4 cups sugar
  • 1 teaspoon salt
  • 1/2 pound (2 sticks) unsalted butter, cut into 16 pieces
  • 1 tablespoon plus 1 teaspoon pure vanilla extract
  • Vegetable-oil cooking spray
Directions
  1. Spray an 11 3/4-by-16 1/2-inch baking pan (this is a half-sheet pan) with vegetable-oil spray. Set aside in a spot where it will not be moved. In a 2-quart saucepan, combine cream and sweetened condensed milk; set aside.
  2. In a heavy 6- to 8-quart saucepan, combine corn syrup, 1 cup water, sugar, and salt. Clip on candy thermometer. Over high heat, cook until sugar is dissolved, stirring with a wooden spoon, 8 to 12 minutes. Brush down sides of pan with a pastry brush dipped in water to remove any sugar crystals.
  3. Stop stirring, reduce heat to medium, and bring to a boil. Cook, without stirring, until temperature reaches 250 degrees (hard-ball stage), 45 to 60 minutes. Meanwhile, cook cream mixture over low heat until it is just warm. Do not boil. When sugar reaches 250 degrees. slowly stir in butter and warmed cream mixture, keeping mixture boiling at all times. Stirring constantly, cook over medium heat until thermometer reaches 244 degrees (firm-ball stage), 55 to 75 minutes. Stir in vanilla. Immediately pour into prepared pan without scraping pot. Let stand uncovered at room temperature for 24 hours without moving.
  4. To cut, spray a large cutting board generously with vegetable-oil spray. Unmold caramel from pan onto sprayed surface. Cut into 1-by-1 1/4-inch pieces, or other shapes. Wrap each in cellophane or waxed paper.
Toffee Butter Crunch

Ingredients

  • 1/2 cup coarsely chopped almonds or pecans, toasted
  • 1 cup butter
  • 1 cup sugar
  • 3 tablespoons water
  • 1 tablespoon light-colored corn syrup
  • 3/4 cup semisweet chocolate pieces
  • 1/2 cup finely chopped almonds or pecans, toasted

Directions

Line a 13x9x2-inch baking pan with foil, extending foil over edges of pan. Sprinkle the 1/2 cup coarsely chopped nuts in pan. Set pan aside.

Butter sides of a heavy 2-quart saucepan. In saucepan melt butter. Add sugar, water, and corn syrup. Cook and stir over medium-high heat until mixture boils. Clip a candy thermometer to side of pan. Reduce heat to medium; continue boiling at a moderate, steady rate, stirring frequently, till thermometer registers 290 degree F, soft-crack stage (about 15 minutes). Watch care-fully after 280 degree F to prevent scorching. Remove saucepan from heat; remove thermometer. Pour candy into the prepared pan.

Let candy stand about 5 minutes or till firm; sprinkle with chocolate. Let stand 1 to 2 minutes. When chocolate has softened, spread over candy. Sprinkle with the 1/2 cup finely chopped nuts. Chill until firm. When candy is firm, use foil to lift it out of pan; break into pieces. Store tightly covered. Makes about 1-1/2 pounds (48 servings).

Thursday, December 24, 2009

Beansy's Birthday

It was Beansy's 4th birthday this past week. She got princess cupcakes for her friend birthday party. I piped pink tiaras with dragees (I don't claim to be an expert piper, but Beansy looked at them and said, "Those are BEAUTIFUL!") on chocolate cupcakes:
I was hoping she would let me make the white chocolate cake so I could combine her birthday cake with the Cake Slice Bakers December cake, but no such luck, so I'll have to do that next week. She wanted Princess Jasmine with a Christmas tree for her cake. Since we were out of town and I forgot all my tools, this is the best I could do. Always the sweetheart, she said, "I love my cake mommy! Jasmine looks so pretty." Sniff.

Tuesday, December 8, 2009

Chili and Cheddar Cheese Drop Biscuits

I know all of you who don't live in warm climates will not think this is winter, but it's been raining and in the 50's and 60's where we live- it feels like winter! :)
Soups and chili are my favorite thing to have when it gets (relatively) cold so I made our first chili of the winter season. This is my go-to chili recipe. It's easy and fast and my family loves it. I'll warn you that it's not gourmet by any means, which is why it's so wonderful! Paired with these cheddar cheese biscuits, it's a great meal to warm you up! (sorry there are no pics of the chili; I thought I had already posted the recipe!)

Favorite Chili

serves 4-6
1 lb lean ground beef
1 onion, chopped
2 cloves garlic, minced
1 16 oz. can kidney beans, undrained
1 28 oz. can diced tomatoes, undrained
1 pkg chili seasoning
1/2 t dried oregano
1/2 t dried basil
for serving:
sour cream
shredded cheese

Brown ground beef in a medium pot. Drain fat and add onions and garlic. Cook until tender, about 4 minutes. Add tomatoes, beans, seasoning and dried herbs. Bring to a boil and simmer on med-low for 10-15 minutes. Top with sour cream and cheese.

Cheddar Cheese Drop Biscuits
adapted from Better Homes and Gardens

1 1/2 cups all-purpose flour
2 T baking powder
1/2 t salt
1/4 t cream of tartar
3 T butter
1 c milk
1/2 c shredded cheddar cheese

1. Preheat oven to 450 degrees F. In a large bowl stir together the flour, baking powder, salt, and cream of tartar. Using a pastry blender, cut in butter until mixture resembles coarse crumbs. Make a well in the center of the flour mixture. Add milk all at once. Using a fork, stir just until moistened. Stir in cheese.

2. Using a large spoon, drop dough into 12 mounds onto a greased baking sheet.

3. Place biscuits 1 inch apart on an ungreased baking sheet. Bake for 10 to 14 minutes or until golden. Remove biscuits from baking sheet and serve warm.

TWD- Chocolate-Cinnamon Sables

Hmm. Shortbread. Not my favorite. I'm always reminded of sawdusty, not very sweet,just kinda greasy cookies.
No thanks.
I almost skipped this week, but then I remembered I'm hardly ever disappointed by Dorie's recipes, so I made half of the recipe, added some cocoa (everything's better with chocolate, right?) and cinnamon and baked them up. Rolled in green and red sugar, these little cookies were sure yummy! My 4 year old ate three and called them "scrumdelicious!"
Check out Barbara's blog for the recipe!

Wednesday, November 25, 2009

Almost Fudge Gateau

I'm not sure if this has made the rotation for TWD, but this easy, chocolatey dessert was a hit at our little monkey's blessing last week. The gateau is dense and moist, and most importantly, chocolatey!
I used a dark chocolate (66% cacao) and it made the dessert so rich, it was great!
Topped with a glaze and some whipped cream, this is a great crowd pleaser!

Saturday, November 21, 2009

CS Bakers- Burnt Sugar Cake

Burnt Sugar Cake.
Burned sugar syrup incorporated into a yellow cake, frosted with icing with the same burnt sugar syrup.Sound sweet?
That's putting it mildly.
This was November's Cake Slice Bakers cake from Southern Cakes by Nancie McDermott. Not a hit in our house. The cake was moist, but overly sweet. The frosting was the powder-y sugar kind that I don't care for. I was hoping for some kind of toasty, caramel-y warm sugar flavor that wasn't present in my cake. This had to be served with ice cream to mellow out the sweetness. I read someone used apples in it to tone down the sweetness, which would be a good idea. Go here for other's ideas and results!

Burnt Sugar Cake

Makes one 9 inch round cake

For the Cake

3 cups all purpose flour

1 tbsp baking powder

½ tsp salt

1 tsp vanilla extract

1 cup milk

1 cup (2 sticks) butter

1¾ cups sugar

4 eggs

½ cup Burnt Sugar Syrup (below)

For the Burnt Sugar Syrup

1 cup sugar

1 cup boiling water

For the Burnt Sugar Frosting

3¾ cups confectioners sugar

½ cup Burnt Sugar Syrup (above)

¼ cup (½ stick) butter

½ tsp vanilla extract

2 – 3 tbsp evaporated milk or normal milk

Method – Burnt Sugar Syrup

Heat the sugar in a cast iron skillet or another heavy bottomed pan with high sides. Heat over a medium-low heat, stirring occasionally, until the sugar melts into a clear brown caramel syrup. It should be the colour of tea. Gradually add the boiling water, pouring it down the sides of the pan so that if the syrup foams and bubbles up, you should be protected.

Continue cooking, stirring often, until the water combines with the syrup and turns a handsome brown syrup. Remove from the heat and set aside to cool. Store the cooled syrup in a sealed jar if not using straight away.

Method - Cake

Heat the oven to 350 degrees F. Grease and flour two 9 inch round cake pans.

In a medium bowl, combine the flour, baking powder and salt and stir with a fork to mix well. Stir the vanilla into the milk.

In a large bowl, beat the butter and the sugar with an electric mixer at high speed for 2 – 3 minutes, until they are well combined. Stop now and then to scrape the bowl down. Add the eggs, one by one, beating well each time. Pour in half a cup of the burnt sugar syrup and beat well. Add a third of the flour mixture and about half of the milk, beating at a low speed, until just incorporated. Mix in another third of the flour and the rest of the milk. Finally, add the remaining flour.

Divide the batter between the cake pans and bake at 350F for 20 to 25 minutes until the cakes are golden brown, spring back when touched gently in the centre and begin to pull away from the sides of the pan. Let the cakes cool in the pans on a wire rack for15 minutes. Turn out the cakes into the wire rack to cool completely.

Method – Burnt Sugar Frosting

In a large bowl, combine the confectioners sugar, the burnt sugar syrup, butter and vanilla. Beat with a mixer at medium speed for 2 to 3 minutes, scraping down the bowl now and then to bring the ingredients together. Add 2 tablespoons of the milk and continue beating until the frosting is thick, soft, smooth and easy to spread. Add a little more sugar if it is thin, and a little more milk if it is too thick.

To Assemble

Place one layer, top side down, on a cake stand or serving plate. Scoop about ¾ cup of the frosting onto the cake. Spread to the edges and place the second cake layer over it, top side down. Frost the sides of the cake, and then the top until it is evenly covered.

Tuesday, November 10, 2009

TWD- Cran-Apple Crisps

Ok, are fresh/frozen cranberries really in the grocery store? I know it's (early) November, but my stores didn't have them in yet. Dorie says she makes this in October when cranberries arrive.
Hmm.

So I just used apples and the dried cranberries. It did need another berry, though, because it was a little dry. I did a little math and only made two of these since my husband is out of town and my parents, who were in town, left last weekend.This is a great quick and easy crisp recipe. The topping (as with all crisps I've ever had) was my favorite part- I loved the addition of coconut. Check out Em's blog for the recipe. And be sure to bookmark it- it's one of my favorites!

Wednesday, November 4, 2009

Peter Pan cake

Not as ornate as Gabe's cake last year, this was a Peter Pan cake with Tinkerbell, the crocodile with Captain Hook's arm, and the rowboat with Mr. Smee's hat.

Tuesday, October 27, 2009

TWD- Cherry-Fudge Brownie Torte

Ohhhh this recipe is SO good!
That's how good it is- I had to start the post by saying that. Chocolate. Cherries. Cream cheese-y mousse on top. I know some people on the P&Q were saying they don't like chocolate and cherries together. Not me. No siree! Black forest? Yes. Cherry-dipped chocolate ice cream cone? Hand it over!
This recipe is a
moist and fudgy brownie base, filled with chocolate chunks and dried cherries (I omitted the kirsch).Then it's topped with a cream cheese marscarpone mousse. I confess here that I made a substitution. Made as is in the recipe, this would have cost me close to $15. For the topping, I used 8 oz cream cheese, 1/4 c sour cream, 2 T butter, 1/3 c sugar and 1T vanilla as in the recipe.
The torte turned out AMAZING and was a big hit with our guests. Check out April's blog for the recipe!

Thursday, October 22, 2009

Amazing Chocolate Brownies

Afternoons are kind of coveted in my house. It's the time when #2 and #3 are asleep and #1 is busy doing something that doesn't involve me. Today, however, she sat next to me and said, "Can we make brownies?" Since I was reading through a Confetti Cakes cookbook trying to figure out some fun Halloween ideas, I had a brownie recipe on hand. So I thought, why not?
Since this is from a kids' cookbook, I figured it would be a simple, no-frills brownie and a guaranteed hit with the kids.
I was not disappointed.
Melted chocolate and butter,
Mixed with sugar, brown sugar, eggs, salt and vanilla,
just until blended, and pour in a pan.
These brownies are moist and chewy, with crispy edges and papery top. Perfect. The girl who owns this giraffe plate ate 2 (after dinner, of course).
Amazing Chocolate Brownies
adapted from Confetti Cakes For Kids
makes 20
1 cup all-purpose flour
1 cup (2 sticks) unsalted butter
8 oz. bittersweet chocolate
4 eggs
1/4 t salt
1 cup granulated sugar
1 cup packed light brown sugar
1/2 T vanilla extract

1. Preheat oven to 350 degrees F. Butter the bottom and sides of a 9" x 13" pan.

2. In a double boiler, melt the butter and chocolate over med-low heat.

3. In the bowl of a standing mixer fitted with the paddle attachment, combine the eggs, salt, sugars and vanilla on low.

4. Slowly add the chocolate mixture and beat on low until combined.

5. Remove the bowl from mixer and fold the flour in using a rubber spatula.

6. Pour batter in prepared pan. Bake for 40 minutes, or until the top has formed a shiny crust and is moderately firm.

7. Allow brownies to cook for 20 minutes in the pan. Release the brownies by running a metal spatula or knife along the sides of the pan. Flip the brownies over onto another pan or cakeboard.

Tuesday, October 20, 2009

Vote for me!

I was chosen as a finalist in a Disneyland Giveaway by Just Spotted, an awesome blog full of great ideas and fun! Will you click here and vote for me (Click on "Jodie")?!!! Please??!!!

CS Bakers- Cinnamon Coffee Cake (TWD post below)

I'm back!! After a few months and a baby, I'm back to the Cake Slice Bakers. We've moved on to a new book, Southern Cakes by Nancie McDermott. This month's recipe is for Cinnamon Coffee cake- a moist coffee cake with a cinnamon raisin filling and topping (I omitted the pecans). This cake was a MAJOR hit at our house. My 3 year old ate it three mornings in a row for breakfast (I know, not the most nutritious, but hey, whatever they'll eat!). I halved the recipe and made it in a 9" round. The cake is moist and the brown sugar-cinnamon topping/filling is so yummy!
October’s Cake: Cinnamon Pecan Coffee Cake

(Recipe from Southern Cakes by Nancie McDermott)

For the Cake

3 cups all purpose flour

1 tbsp baking powder

1 tsp salt

1 tsp vanilla extract

1 cup milk

1 cup (2 sticks) butter, softened

1 cup sugar

2 eggs

For the Cinnamon Raisin Filling

1½ cups light brown sugar

3 tbsp all purpose flour

3 tbsp cinnamon

1½ cups raisins

1½ cups coarsely chopped pecans (I omitted)

¾ cup (1½ sticks) butter, melted

Method

Heat the oven to 350 degrees F. Grease and flour a 13 by 9 inch pan.

To make the filling, combine the light brown sugar, flour and cinnamon in a bowl and stir with a fork to mix everything well. Combine the raisins and pecans in another bowl and toss to mix them. Place the cinnamon mixture, nut mixture and melted butter by the baking pan to use later.

To make the cake batter, combine the flour, baking powder and salt in a bowl. Stir the vanilla into the milk. In a large bowl combine the butter and sugar and beat with a mixer on high speed until pale yellow and evenly mixed, about 2 minutes. Scrape down the bowl to ensure a good mix. Add the eggs and beat for another 2 minutes, scraping down the bowl now and then, until the mixture is smooth and light.

Use a large spoon or spatula to add about a third of the flour mixture to the butter mixture and stir only until the flour disappears. Add a third of the milk and mix in. Repeat twice more until all the flour and milk mixtures have been incorporated. Stir just enough to keep the batter smooth.

Spread half the batter evenly into the prepared pan. Sprinkle half the cinnamon mixture over the batter followed by half the melted butter. Scatter half the raisins and nuts over the top. Spread the remaining batter carefully over the filling, using a spatula to smooth the batter all the way to the edges of the pan. Top with the leftover cinnamon, butter and nut mixture, covering the cake evenly.

Bake for 45 to 50 minutes, until the cake is golden brown, fragrant and beginning to pull away from the edges of the pan. Place the pan on a wire rack and allow to cool in the pan for 5 to 10 minutes before serving in squares right from the pan. The cake is delicious hot, warm or at room temperature.

TWD- Sweet Potato Biscuits

This week's recipe was chosen by one of my favorite blogs, Prudence Pennywise. Erin's blog is so fun to read and she has some really fun ideas. She also went to by alma mater so you know she must be smart. :)
The recipe is for Sweet Potato Biscuits- a light flaky biscuit, just slightly sweetened with brown sugar. The recipe recommends canned sweet potatoes in syrup. Since I used a fresh sweet potato, mine probably weren't as sweet as they should've been.I think I might have done something wrong because mine didn't rise to the "golden and puffy" that indicated they were done. More like golden and flat.
They were pretty tasty, though, and I really want to try them with pumpkin instead of sweet potatoes! Check out Prudy's blog for the recipe!

Tuesday, October 6, 2009

TWD- Split-Level Pudding

I admit I haven't had the best of luck making Dorie's recipes that have pudding or custards. I think they turn out too eggy. Unfortunately, it happened again with this one. The pudding, which is a vanilla (I did cinnamon) pudding on top of (or in my case surrounded by) chocolate ganache. It looks and sounds wonderful- the picture in the book looks fabulous. I thought the flavor was really good, but the cinnamon pudding was eggy. I also thought there were a lot of steps- put things in the food processor, take them out, put other things in, pour them out, cook, and put them back in, blah, blah....Sorry, does this post sound negative? Maybe it's because I'm out of town and it was SNOWING today. :) Check out Garrett's blog for the recipe!

Tuesday, September 29, 2009

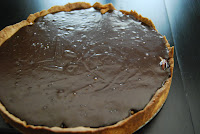
TWD- Chocolate-Crunched Caramel Tart

The picture of this week's TWD looks so amazing. I've been wanting to make it ever since I bought the book. Unfortunately, we don't normally have nuts in my house so I never got around to making it. So of course I was excited when Carla of Chocolate Moosey picked it for this week. Caramel, peanuts, chocolate ganache in a flaky tart? YUM!
The recipe is broken into three parts- the tart dough, the caramel, and the ganache. The tart is pretty straight forward- it all comes together in a food processor. I used a springform pan because I don't have a tart pan (I know, I need to get one!).
The caramel component was problematic for me. It doesn't require a thermometer- accroding to the instructions, you can just judge by the way the mixture looks. I let my cook too long- it ended up greasy and clumpy. So the second time I made it, I skipped the last 2 minute cook and took it off the heat after adding the cream. It worked great- a smooth, workable caramel that spread easily in the tart.The ganache was beautiful- shiny, smooth. I couldn't wait to try it.
I know I might get some flak here, but I wasn't crazy about it. I didn't think the caramel/peanut layer made enough of a showing- the inch of ganache overshadowed it so it just tasted like chocolate tart. Maybe it was because I made it in a nonconforming pan? Next time I would prefer a thicker caramel/peanut layer and a thinner ganache layer. Head to Carla's blog for the recipe!

Thursday, September 24, 2009

Roller Skate Cake

Well, it actually turned out looking more like a car because I was afraid to suspend the skate on top of the wheels in the heat we're having now. The cake, skate and wheels are all red velvet with cream cheese buttercream.

Tuesday, September 22, 2009

TWD- Cottage Cheese Pufflets

Cottage cheese gets a bad rap. I know a lot of people who think it's disgusting, but I like it. Not with canned fruit or anything, and yes, my mom did put it in lasagne when I was growing up (gasp!).
But, hmm, cottage cheese cookies? Sounds... chunky.

No, these cookies have pureed cottage cheese, butter, a tiny bit of sugar and flour and come together in minutes. After a chill and a roll, you cut them in squares fill them with jam (I opted for chocolate), and bake.They might be better with jam- there wasn't much flavor aside from the chocolate. The slight tang from the cottage cheese may have gone better with fruit as well. Check out Jacque's blog for the recipe!

Tuesday, September 15, 2009

TWD- Flaky Apple Turnovers

I always approach pastry recipes with a little apprehension- I don't love cutting butter into flour until it "resembles crumbs." But this recipe sounded so good and easy, I was excited to make it. Chosen by Julie of Someone's in the Kitchen, this recipe was pretty easy, although it required more dough-chilling than I like. I admit I skipped the second chill- I rolled it out between waxed paper, cut the circles and put it in the freezer for a few minutes. Then I peeled the circles off, filled and baked them.
I quartered the recipe and still got close to 8 turnovers. This pic was taken by husband before he ate them all. :)

Tuesday, September 1, 2009

TWD- Espresso Cheesecake Brownies

This week was chosen by Life in a Peanut Shell for Espresso Cheesecake Brownies. I thought these sounded really good- a moist brownie topped with an espresso cheesecake layer, topped with sweetened sour cream. Actually, now that I type that out, it sounds like a lot. And it was.
Don't get me wrong, I love brownies and I LOVE cheesecake. I would like a brownie cheesecake. But not so much cheesecake on top of a brownie. With sour cream. The whole thing was a little much for me. And I thought the tangy sour cream and the tangy cheesecake was too tangy for me.
Check out Melissa's blog for yummy pics and the recipe!

For some reason, my pics aren't uploading. I'll try again later!

Thursday, August 27, 2009

Updates to come...

Sorry I've been MIA. This has been taking up my time:And this little girl's birthday cake (a little sloppy, but hey, I didn't make it in my kitchen):TWD brownies will be coming next week!

Tuesday, August 11, 2009

TWD- Brownie (Jumbo) Buttons

Mmm... brownies. As I've mentioned before, my husband claims to not be a brownie fan, so when I saw that these were chosen this week by Jayma, I wasn't too sure about making them. Then I saw that they take about 5 minutes, only make a few (even fewer if you make them in a regular muffin pan like I did- you'll get exactly 6), and got rave reviews on the P&Q so I went ahead and made them with my daughter. These are GREAT if you ever need a quick treat and as far as brownies go, they're my favorite kind- moist, chewy and dense (not cakey).
And you know my non-brownie-loving husband had one and liked it. :) Check out Jayma's blog for the recipe!

Tuesday, August 4, 2009

TWD- Classic Banana Bundt Cake

This week's TWD was chosen by one of my (and lots of other people's) favorite blog The Food Librarian for Classic Banana Bundt Cake. We love banana bread at our house so I was sure this would be a hit. Husband and Monkey #1 liked it, but Monkey #2, who doesn't really like cake/bready food (I'm not sure whose kid she is) wasn't crazy about it.
I'm not sure what I was expecting, but, while it's really good, it isn't really any different than banana bread. Very moist and not too sweet, this would be great as a breakfast or snacking cake. I didn't make the lemon glaze listed in the sidebar, but others recommended it!
Check out Mary's blog for this and other fantastic recipes!

And this is the newest Monkey in our house (a boy this time!):

Tuesday, July 28, 2009

TWD- Vanilla (Egg) Ice Cream

I love homemade ice cream. I personally haven't perfected the process, but whenever I have someone else's, it's heavenly. The last TWD ice cream was pretty good- nice and creamy and rich. So I had high hopes for this one, especially since the P&Q had nothing but good things to say. This recipe, chosen by Lynnylu, is basic- hot milk and cream is added to egg yolks and sugar and cooked until it reaches the specified temperature. Somewhere I went wrong because mine just tasted like eggs. I used high quality vanilla extract, but it didn't mask the eggy flavor.Sad. I was so looking forward to some creamy vanilla ice cream. Not even root beer could save this! Although, I may try....

Sunday, July 26, 2009

I'm Back!

My family went to Solvang, CA for my parent's 40th wedding anniversary. If you've never been there, you should take a trip. It's the Danish capital of the United States (what that means, I'm not sure) and is filled with wonderful bakeries, restaurants, museums and shops. The highlight of our week was the Farmer's Market which was not big, but AMAZING. The best berries, peaches and nectarines I've ever tasted. My taste buds have been spoiled and no fruit will ever be the same.
Blue hydrangeas are my favorite flower. Aren't these beautiful?!!
Then there was this. People kept telling us we had to try them and we saw someone walking around with it on the street. It's called an Aebleskiver and is kind of like a round pancake/doughnut thing covered in raspberry jam and powdered sugar. It was pretty wonderful, but I was jealous of the people I saw who got it with ice cream!
And we made it back without me going into labor! TWD Vanilla Ice Cream coming soon!